Table of Contents
Hey, beauties! St. Patrick’s Day is just around the corner, and you know what that means—time to get those nails on point! Today, we’re diving into all things St. Paddy’s Day for your fingertips. Think bold greens, subtle gold accents, and even some four-leaf clover flair if you’re lucky. You’ll walk away knowing how to create the ultimate holiday-inspired nail art, and I’m throwing in my top product picks to get the job done right. By the end of this post, your nails will be more captivating than a pot of gold at the end of a rainbow. Let’s get sham-rockin’!
Four Leaf Glam Glitter
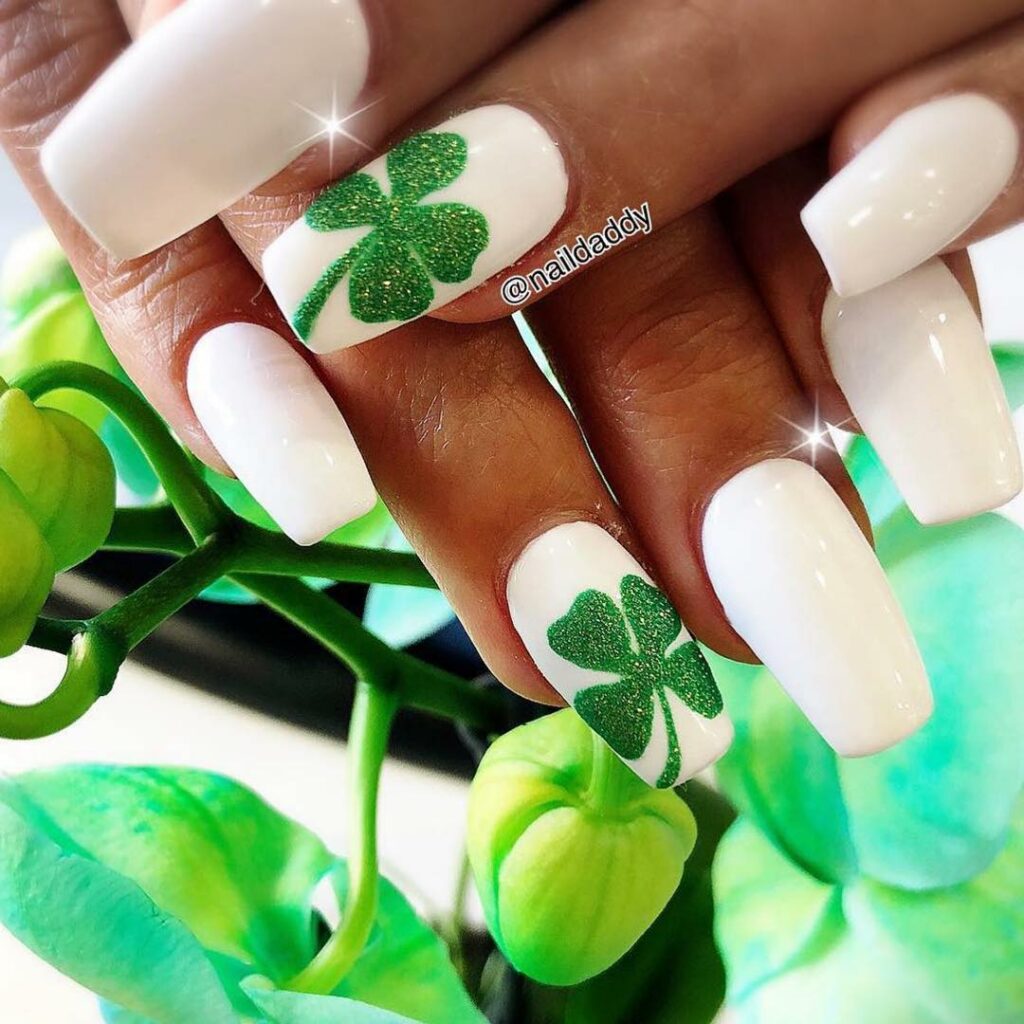
Four Leaf Glam Glitter nails are your ticket to all-out sparkle this St. Patrick’s Day. With shimmering shades of green and gold glitter arranged in a playful clover pattern, you’re not just celebrating—you’re making a fabulous statement!
Matt Green Meets Gold Glam Nails

For those who want to combine a little grit with their glitz, Matt Green Meets Gold Glam nails are the way to go. The matte green base gives a cool, earthy feel, while the gold accents or glitter cut across with unexpected glamour—perfect for turning heads at your St. Patrick’s Day shenanigans!
Simply Clover
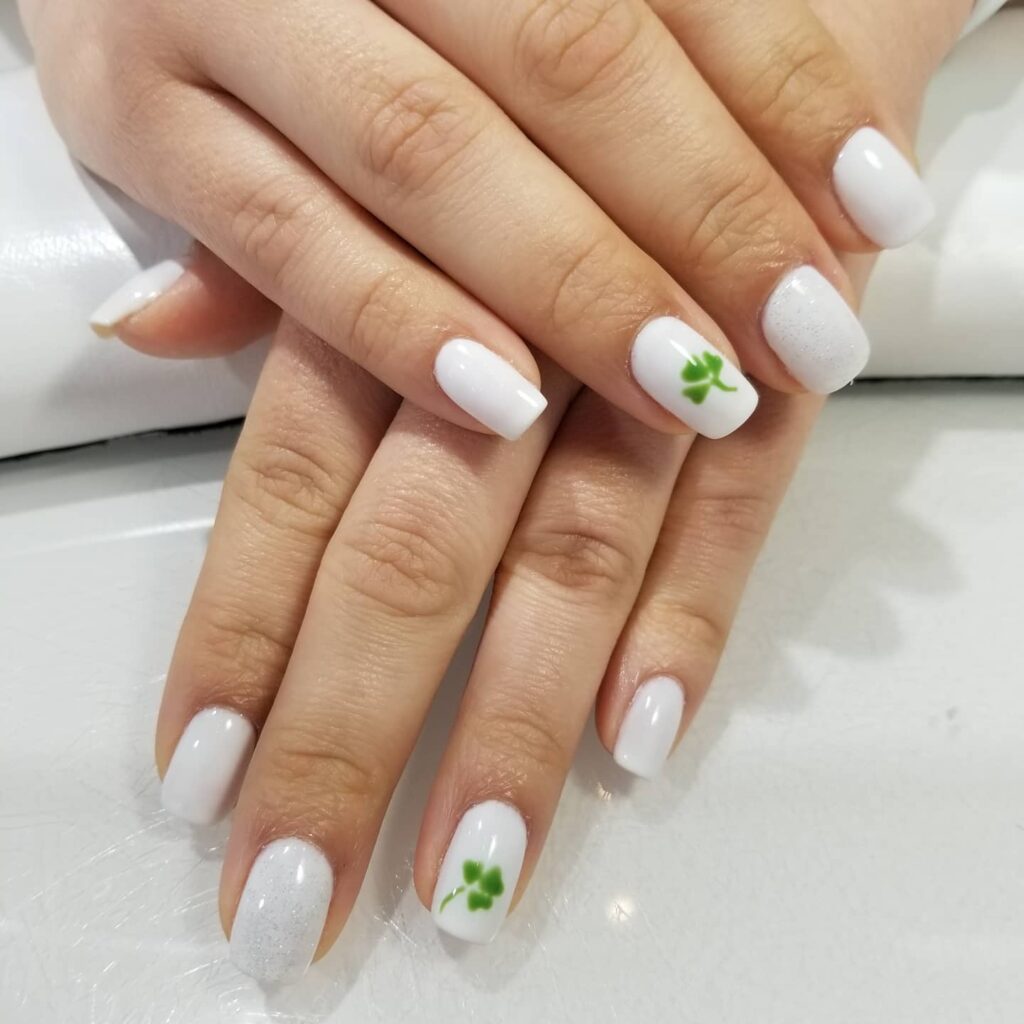
You don’t have to be a nail art guru to get into the spirit. Stick some cute clover stickers on a white base, and voila! You’ve got yourself an effortlessly charming look. I found these adorable clover stickers at my local beauty store, and they were a game-changer.
Luck Of The Irish
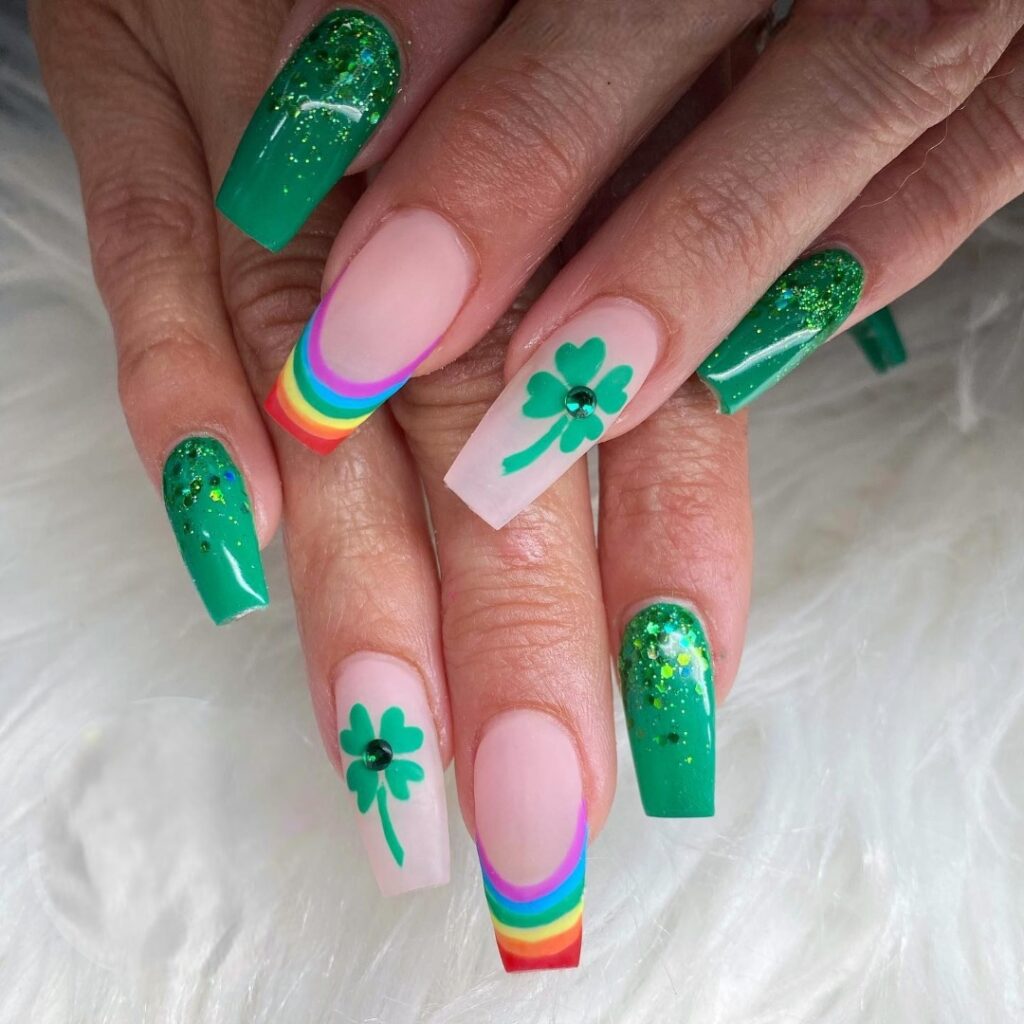
This look is everything St. Patrick’s Day is: vibrant, exciting, and full of flair. Whether you have Irish roots or love any excuse to wear green, this design is an all-around win.
Green Gradient
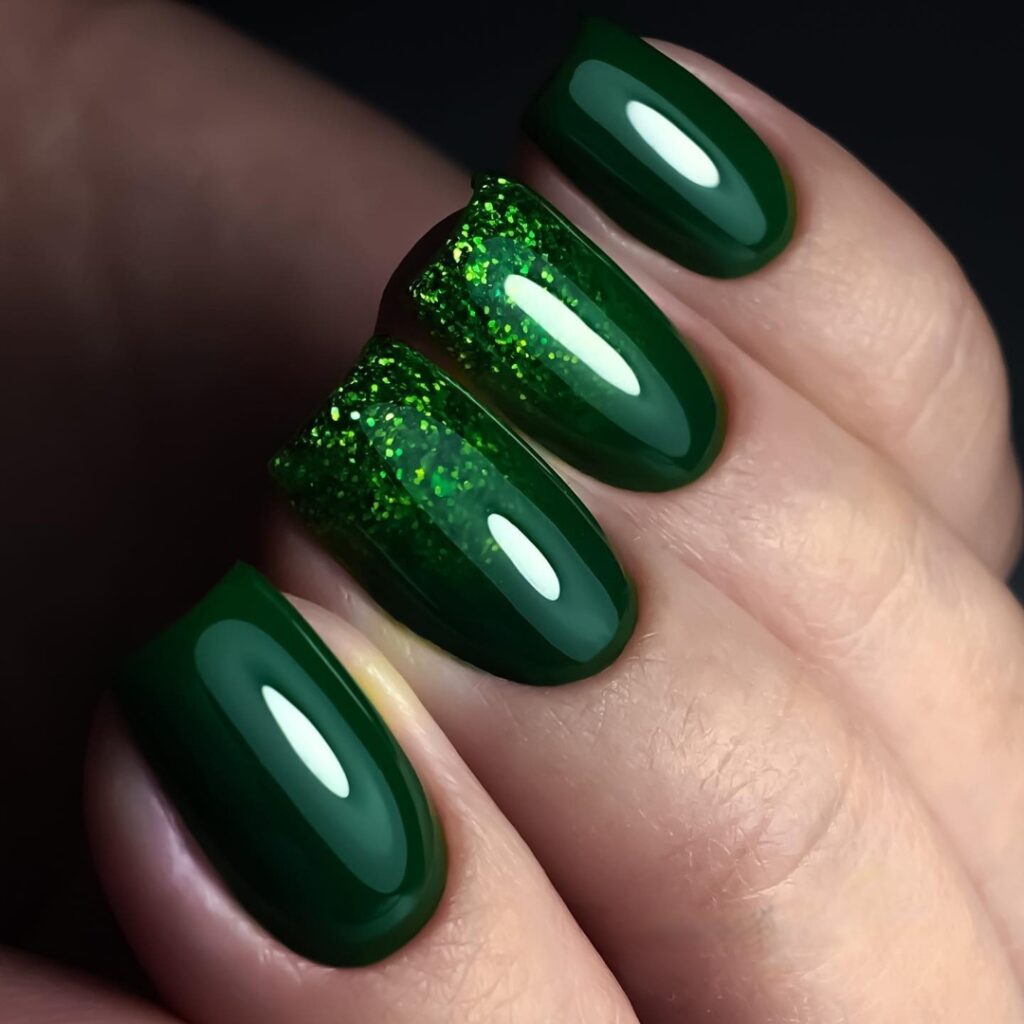
Who doesn’t love a good gradient, right? I’ve rocked this look for a couple of holidays, and it never disappoints. It blends multiple green shades, so it transitions seamlessly from pre-St. Patrick’s Day prep to post-holiday hangovers. Throw in some sparkles, and you’re good to go!
End-of-the-Rainbow Realness
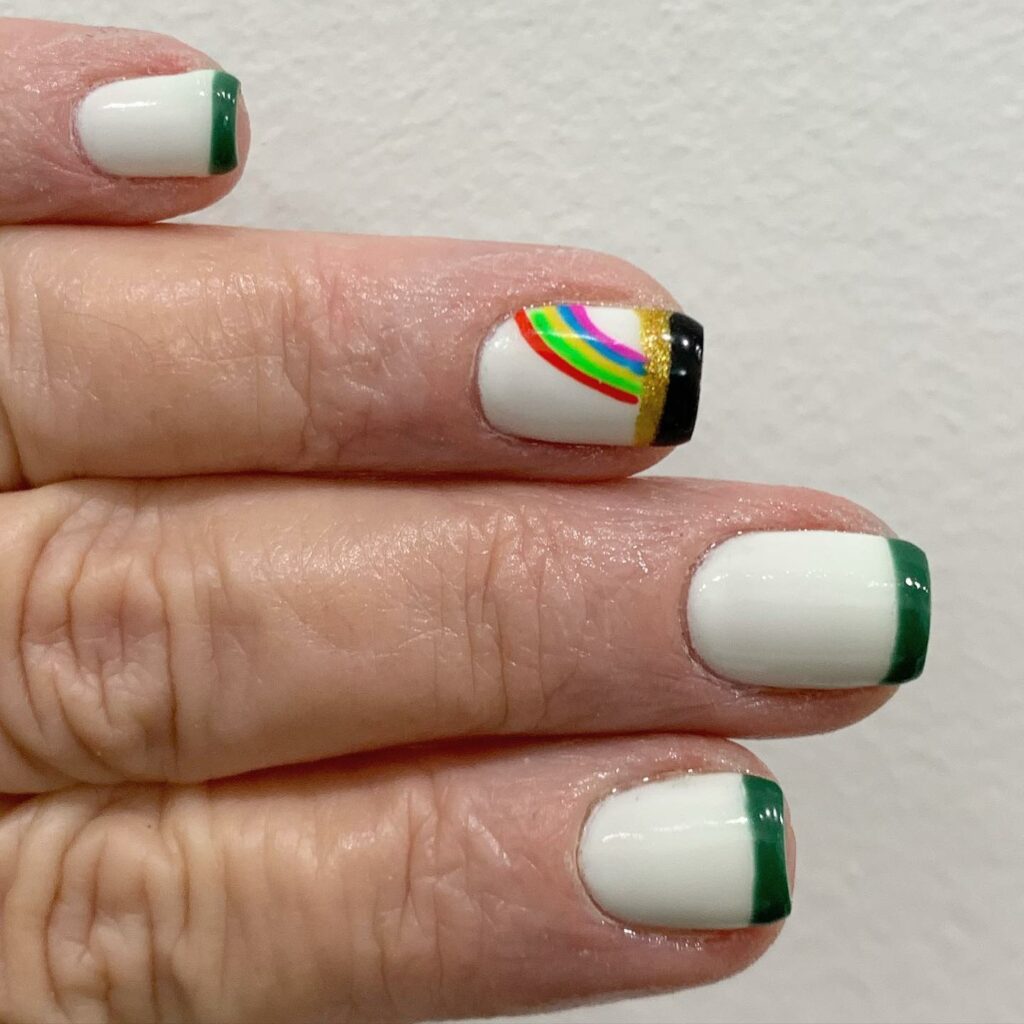
The journey from thumb to pinky is a whimsical road leading to a pot of gold. This look combines a pastel base with a gradient from red to purple, and it’s a showstopper.
Geometric Design for St. Patrick’s Day Nails
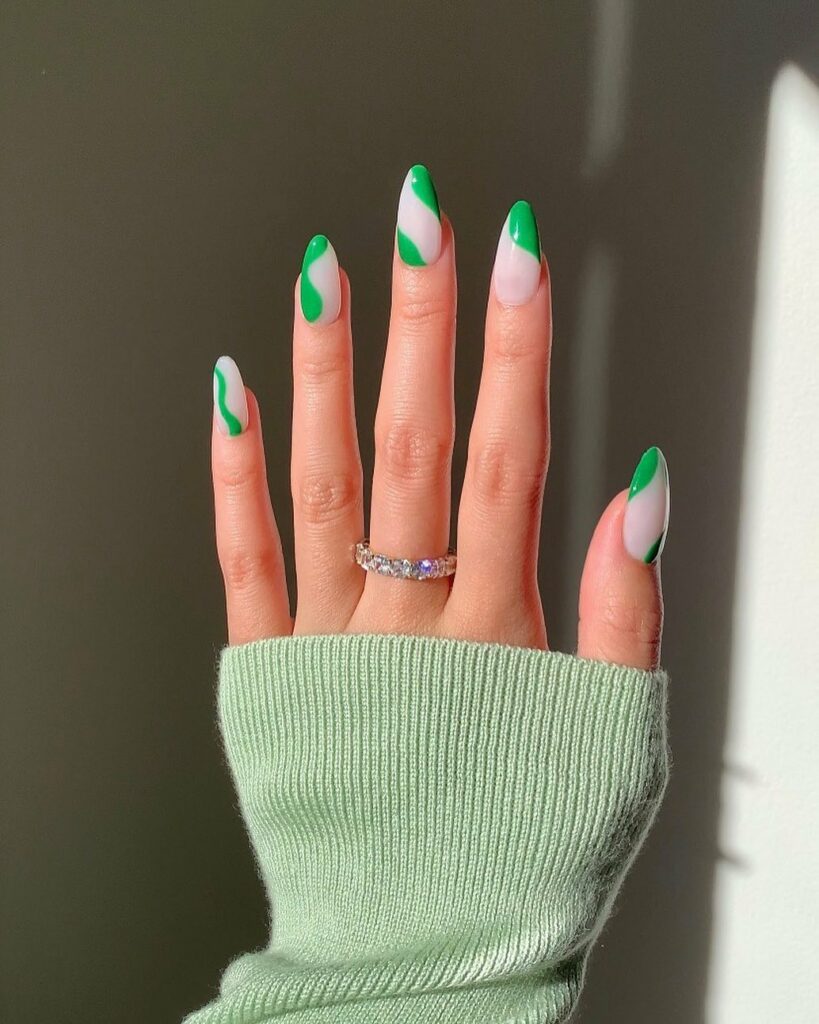
This design’s clean lines and geometric shapes are just too eye-catching to pass up. Pair it with a nude background, and it’s a St. Patrick’s Day must-try.
The Tricolor Classic
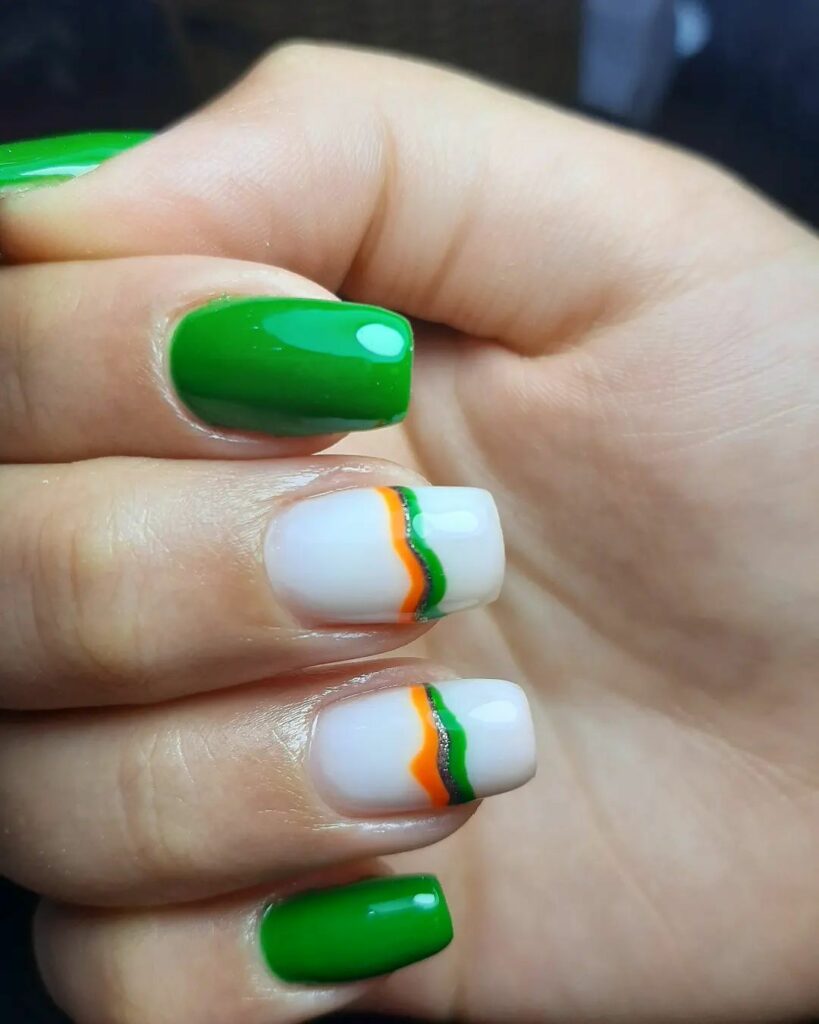
Ireland’s flag is a straightforward yet effective way to showcase your St. Paddy’s pride. Swipe on a vertical stripe of green, white, and orange and let those flags wave—or at least, your nails!
Simple And Solid
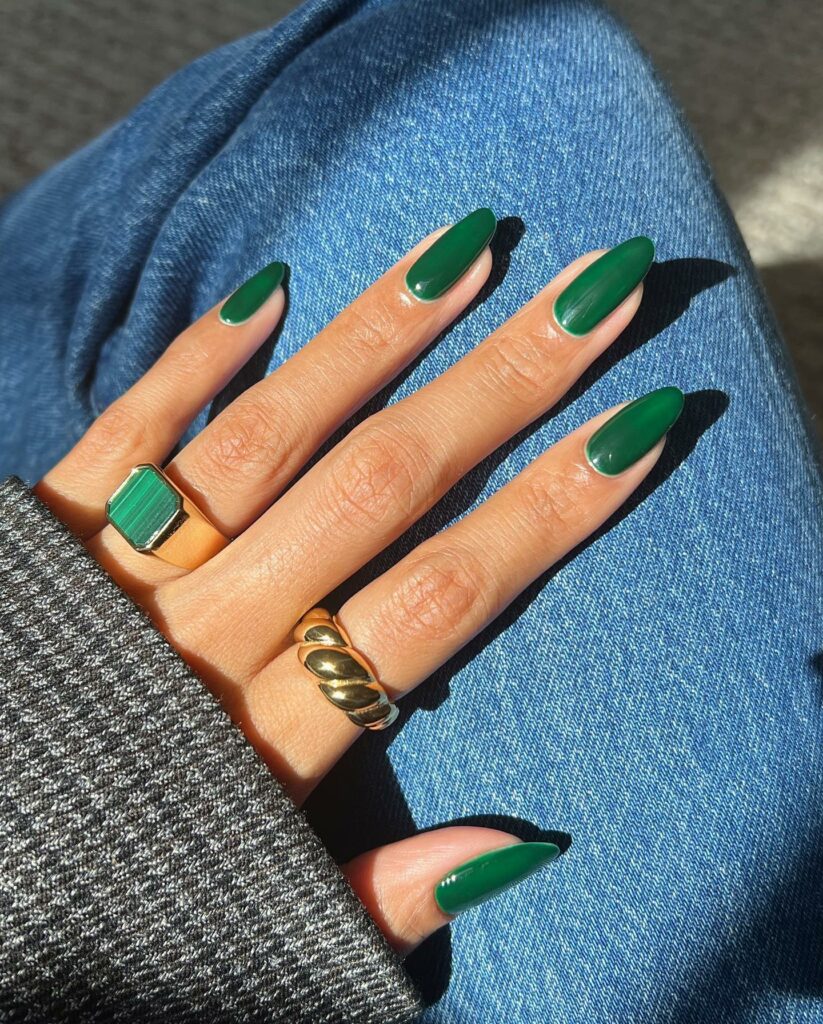
Look, we all have those days when less is more, and you’re just not in the mood for any intricate artwork. In comes our savior—emerald green. It’s simple yet so on-theme for the holiday. I’ve often gone for this when pressed for time but still want to look put together.
Subtly Festive
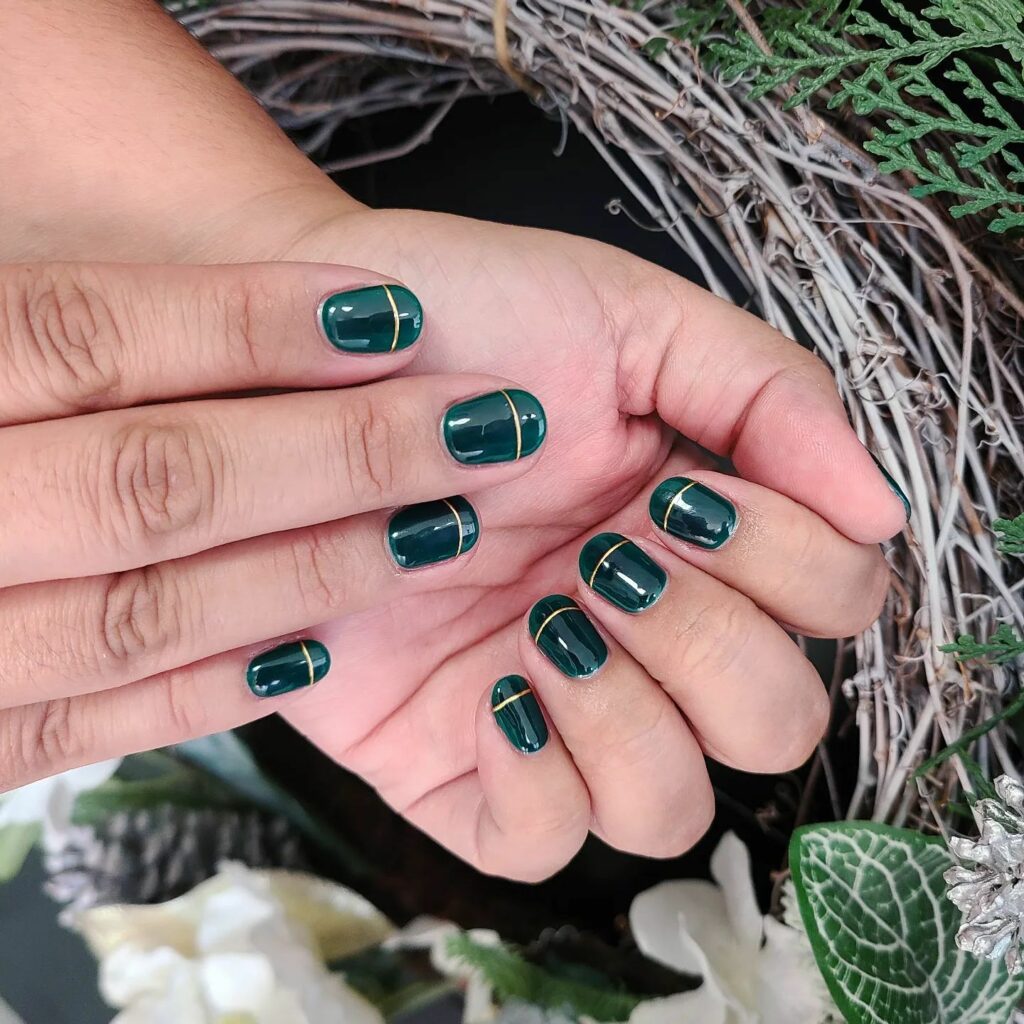
If you’re looking for something more subdued but still in tune with the holiday, go for an understated hunter green. Add some finesse with a gold nail tape; it’s sleek, modern, and won’t make you feel like you’re trying too hard.
Get Lucky
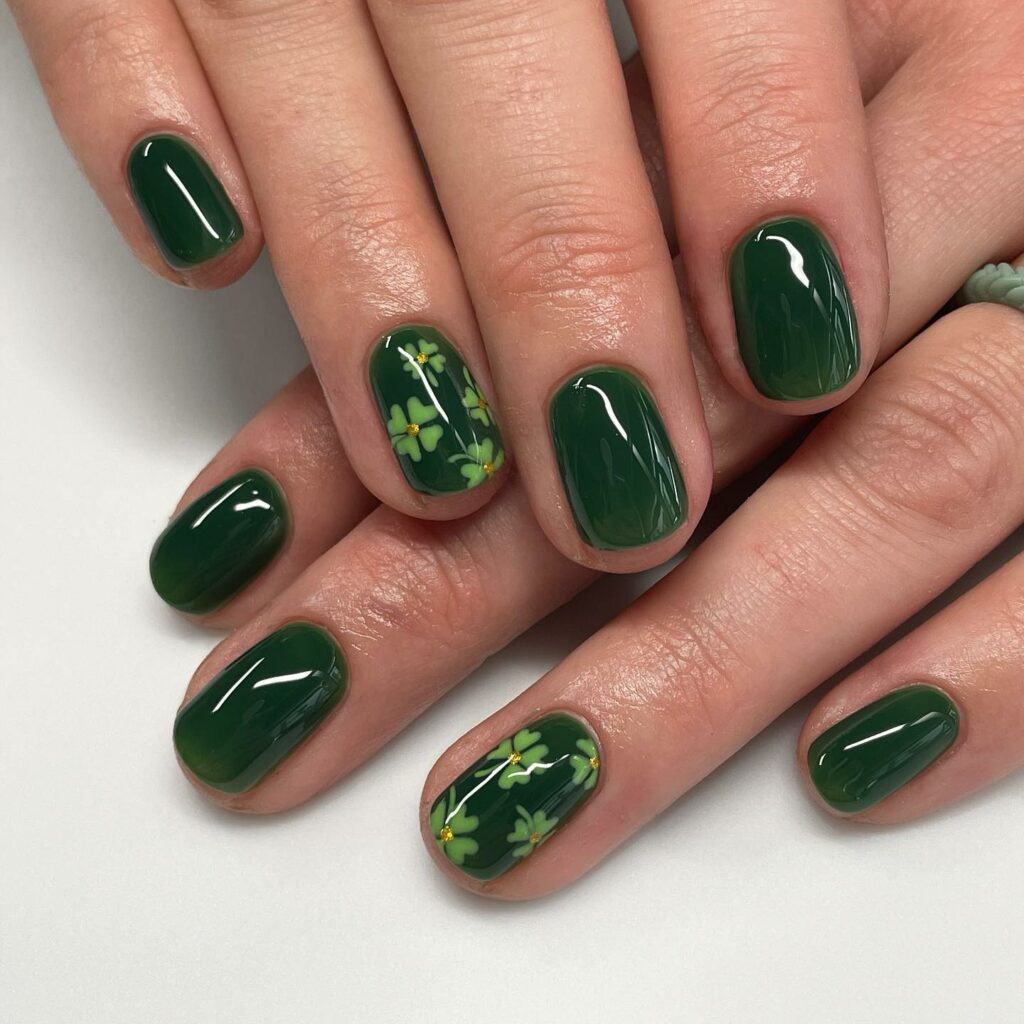
Sparkling green shamrocks on a green base? That’s like the luck o’ the Irish but in manicure form! And don’t worry if you’re not an artist; a shamrock sticker works wonders.
Minimalist Chic
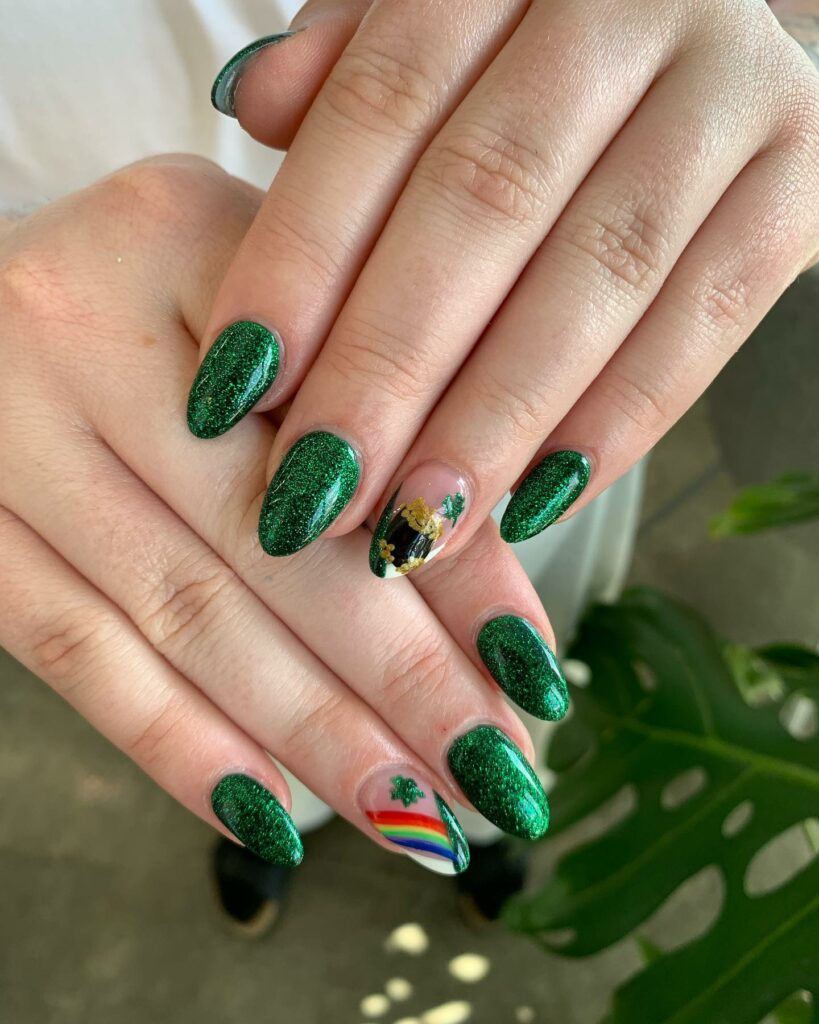
This one’s for my minimalist babes out there. A crisp green base with tiny black accents—so chic yet so festive. Grab a nail pen for those intricate details, and you’re good to go.
Twist On A French Classic
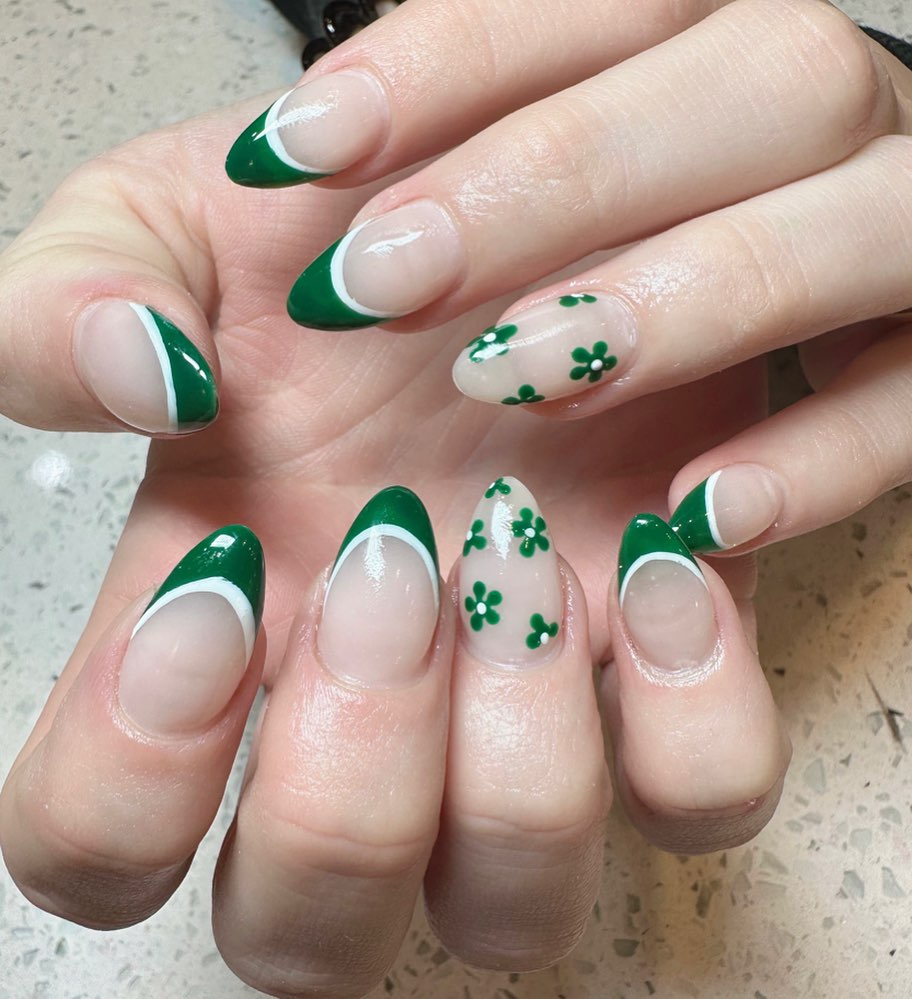
Switch out your traditional French tips for a dazzling green. This look is a conversation starter but also classy enough for any setting.
Go Big Or Go Home
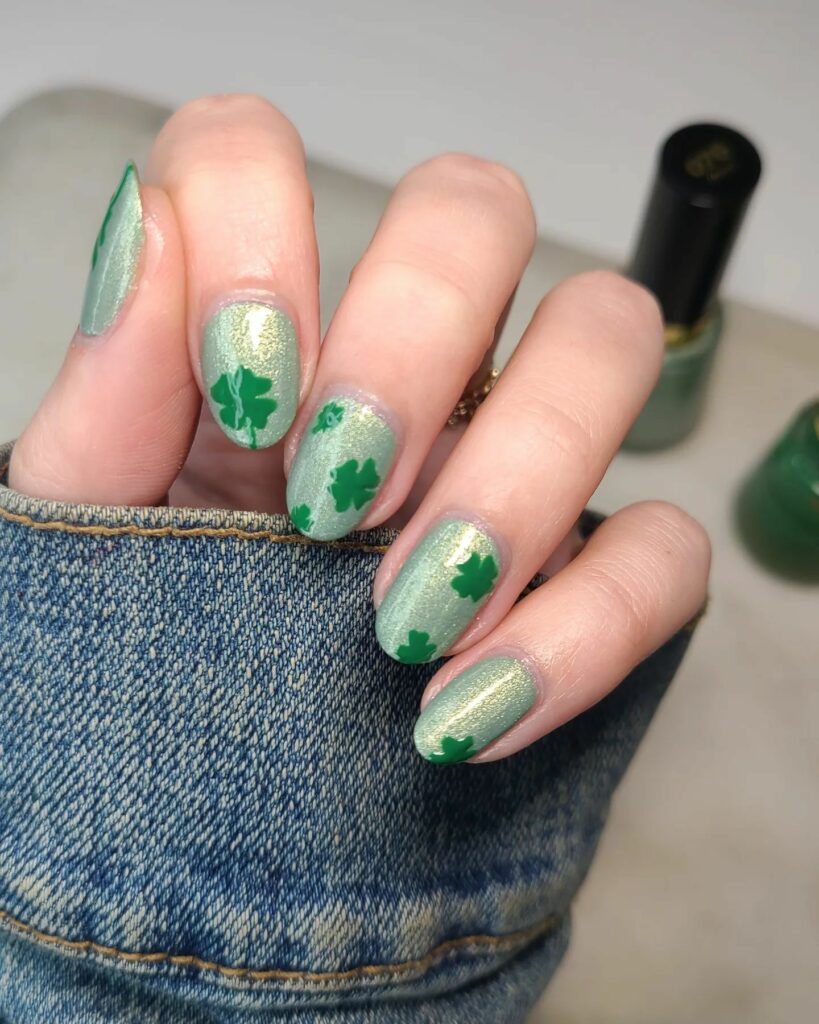
Glitter? Mini shamrocks? Why not both! Layer anything you fancy over a light green base, and let your nails be the life of the party. I tried this last year, and it was a hit.
Beyond The Rainbow
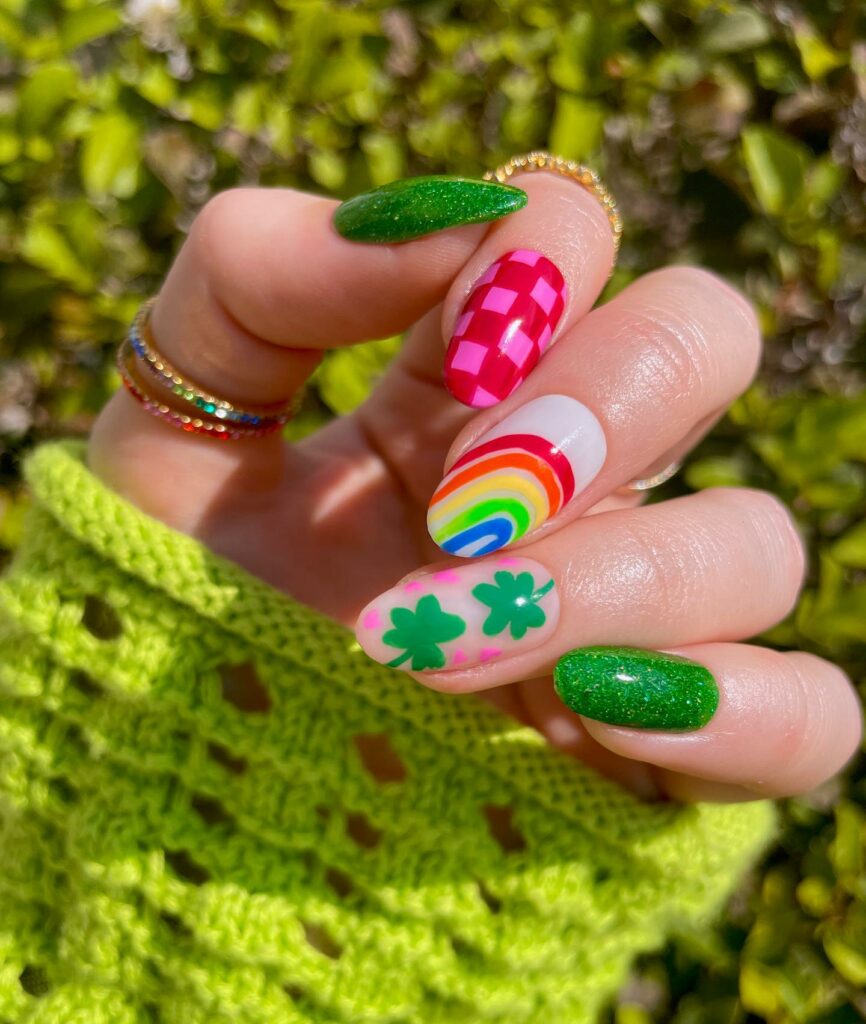
Rainbows and shamrocks combine in this fun, colorful gradient. It’s like finding a pot of gold at the end of your nails. Adorable and absolutely mesmerizing.
The Sophisticated Choice
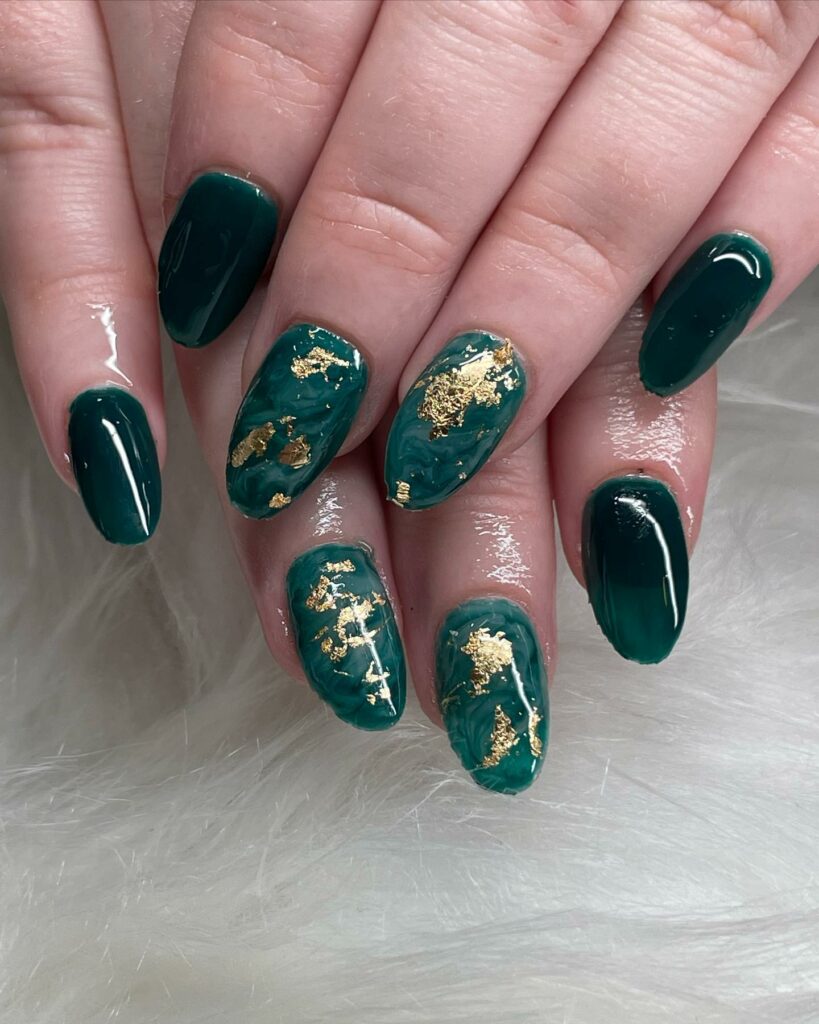
Elevate a forest green manicure with some golden decals. It’s a refined look but still keeps the St. Paddy’s Day spirit alive.
Futuristic Vibes
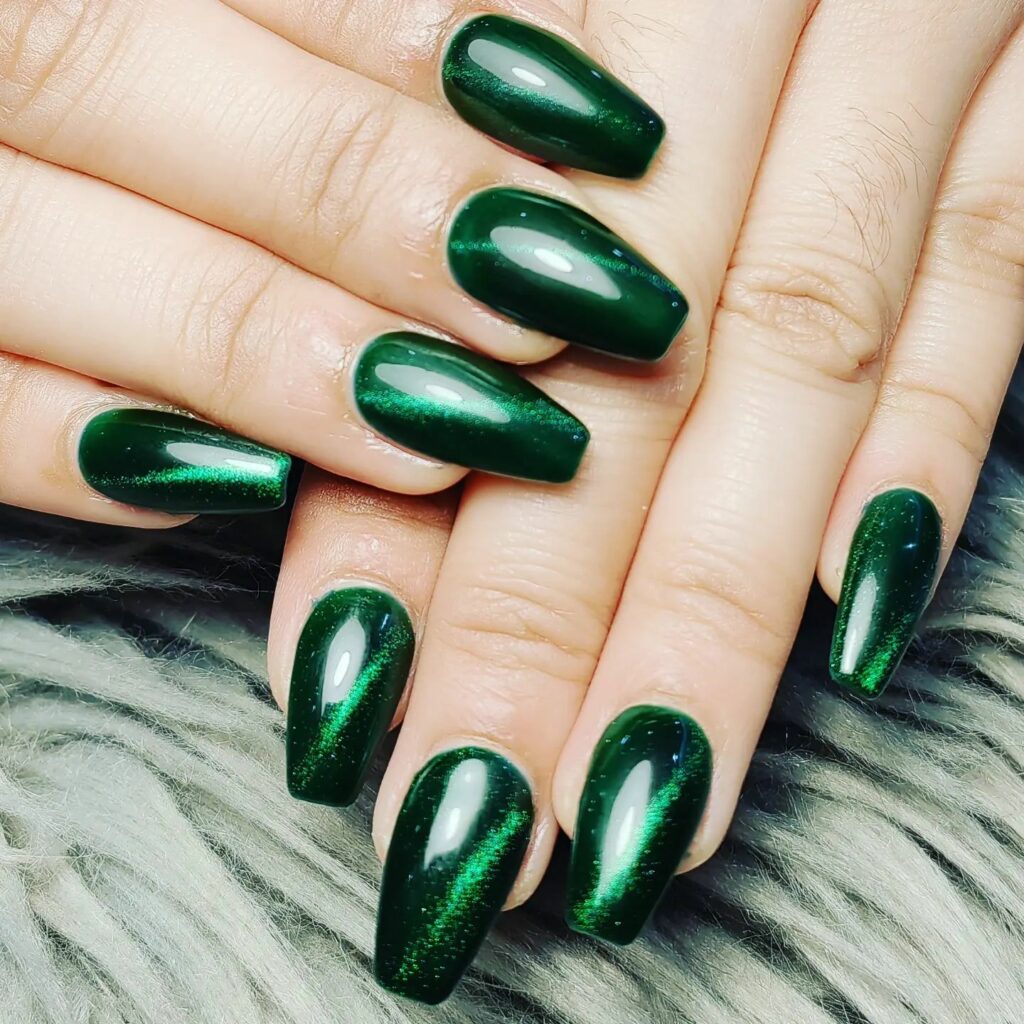
Metallic green nails add a modern twist that’s unlike anything else. It’s St. Patrick’s Day, but make it fashion.
Plaid and Proud
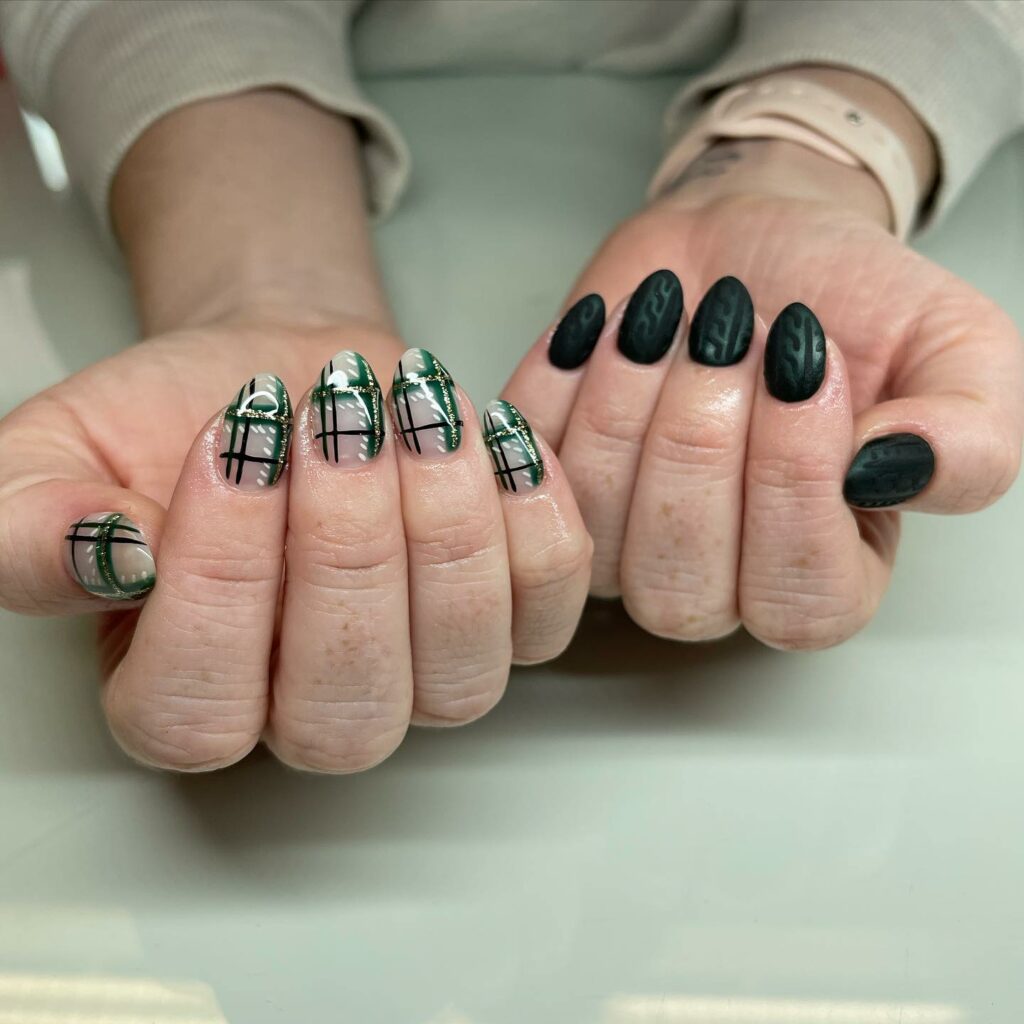
Imagine Cher from Clueless celebrating St. Patrick’s Day—she’d totally rock these plaid nails with a cute clover accent.
Leprechaun’s Luck
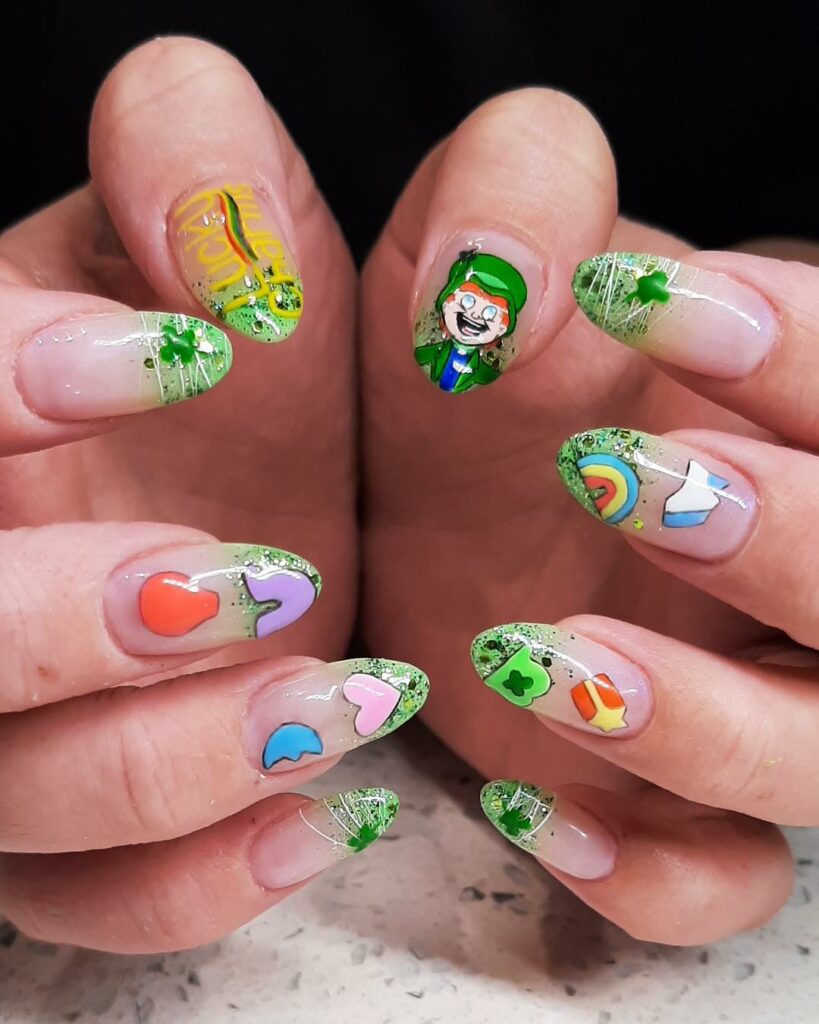
If you’re all about that St. Paddy’s Day spirit, you must try this! A full-on leprechaun on the middle finger, surrounded by gold glitter and adorable green dots—it’s a look only for true enthusiasts.
Luck Of The Irish
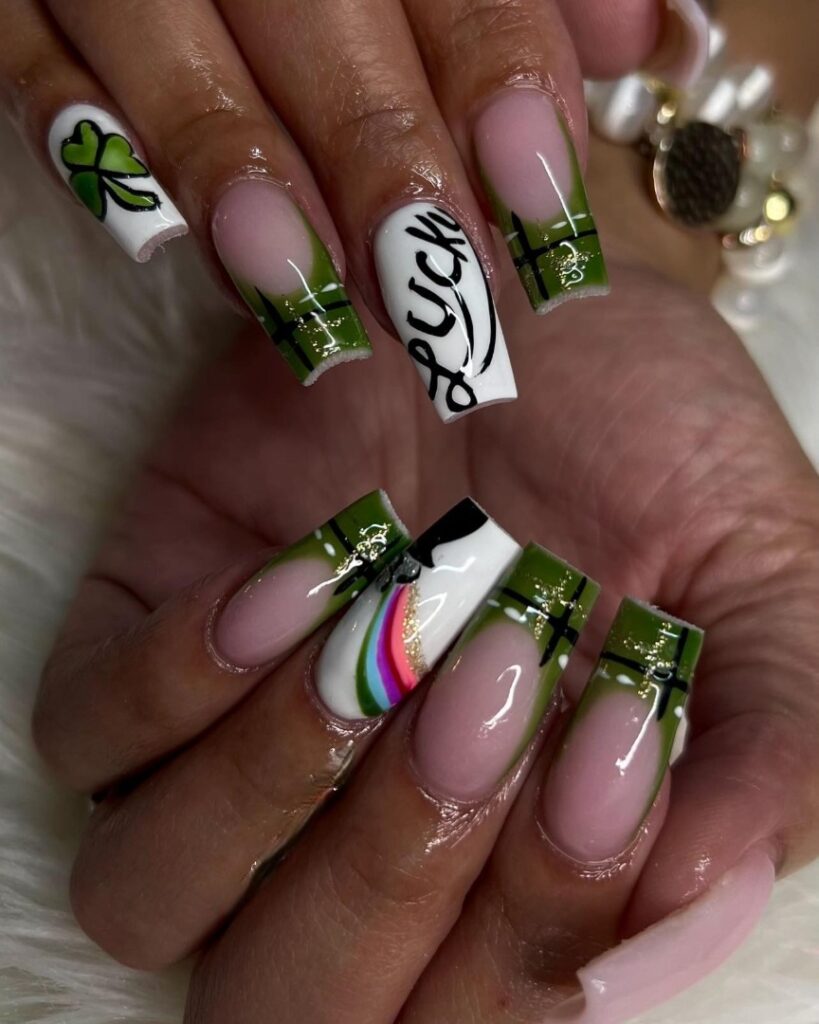
We all need luck to get through the lively St. Patrick’s Day celebrations, right? Think horseshoes, clovers, and other lucky symbols stamped onto your nails for this look. I tried this once and felt invincible the whole day. Trust me, you’ll want this extra boost!
Marble Madness
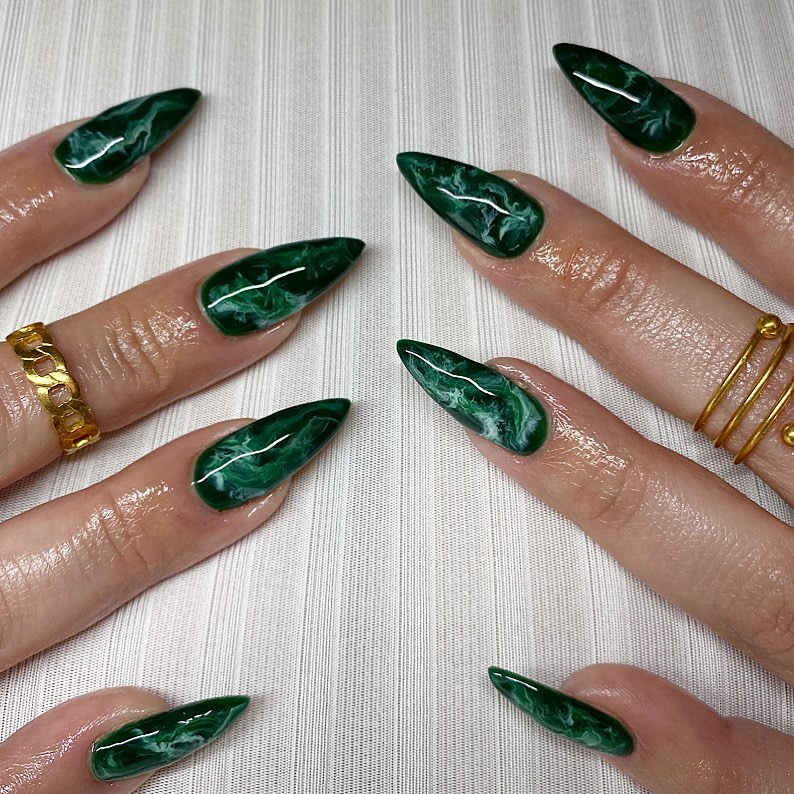
This is where sophistication meets celebration. A marbled mix of green, black, and gold—it’s a mani you won’t want to remove right after the holiday. Plus, it pairs perfectly with any outfit!
Minty Fresh
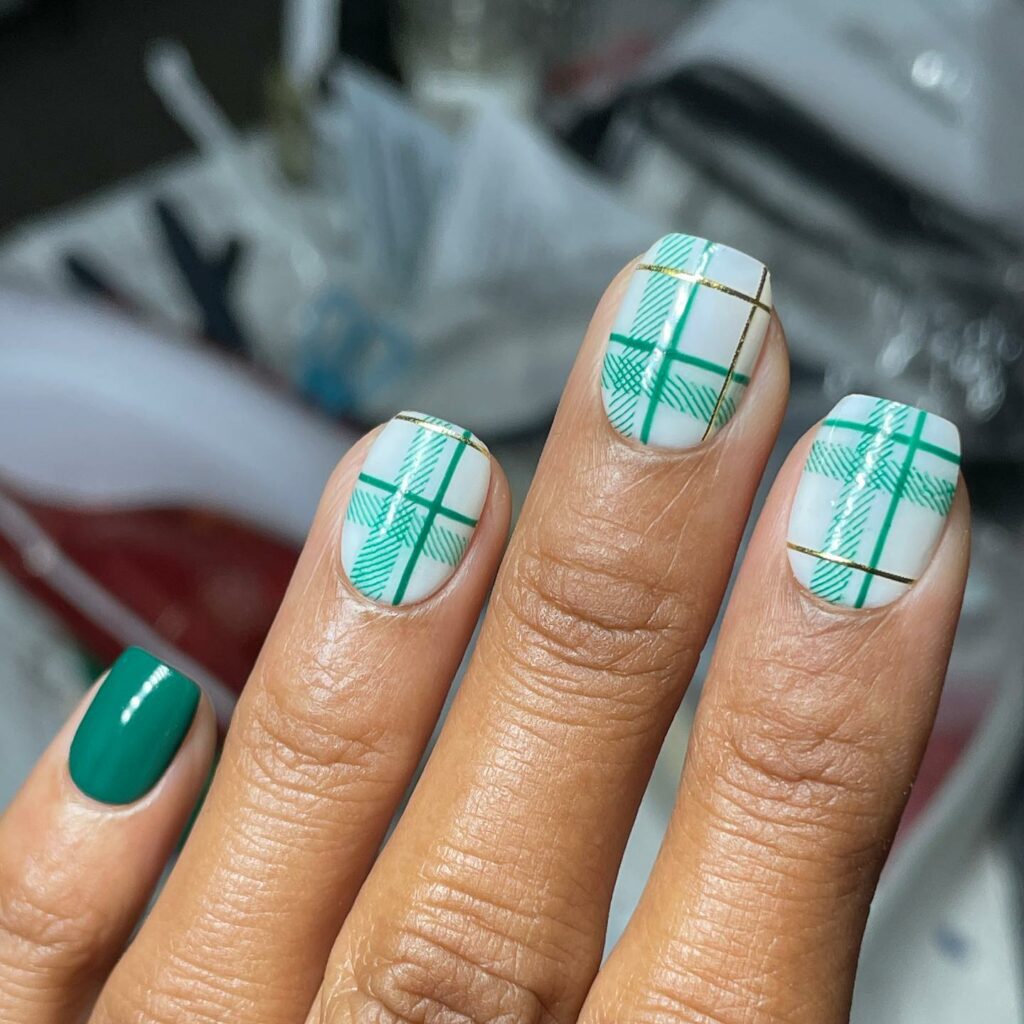
I adore this look because it screams springtime while nodding to St. Patrick’s Day. It’s plaid but fresh, making it a two-in-one win for the season.
Gold Foils
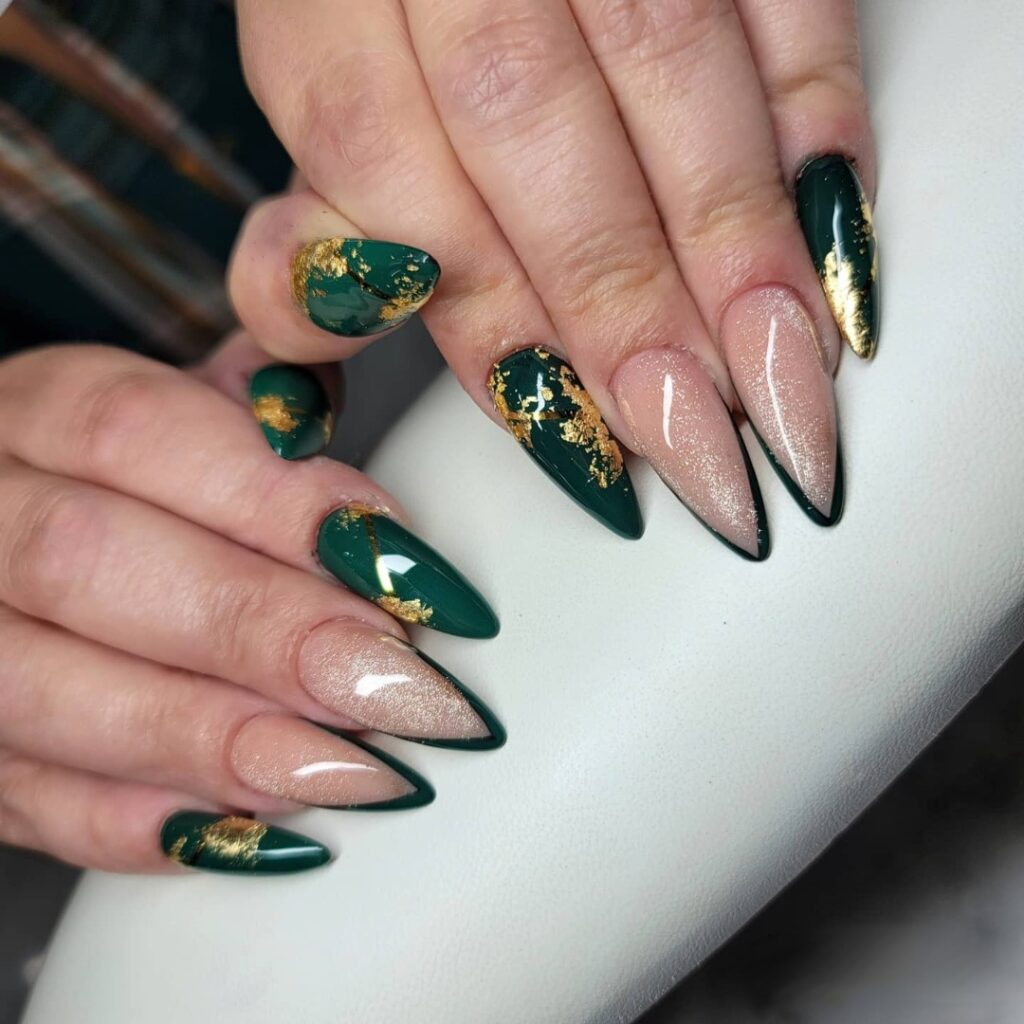
Matte nails are having a moment, so let’s keep up with the trend. Add some gold foil accents to make those nails pop! It’s a look I swear by for an added touch of glam.
Peek-a-Boo Green
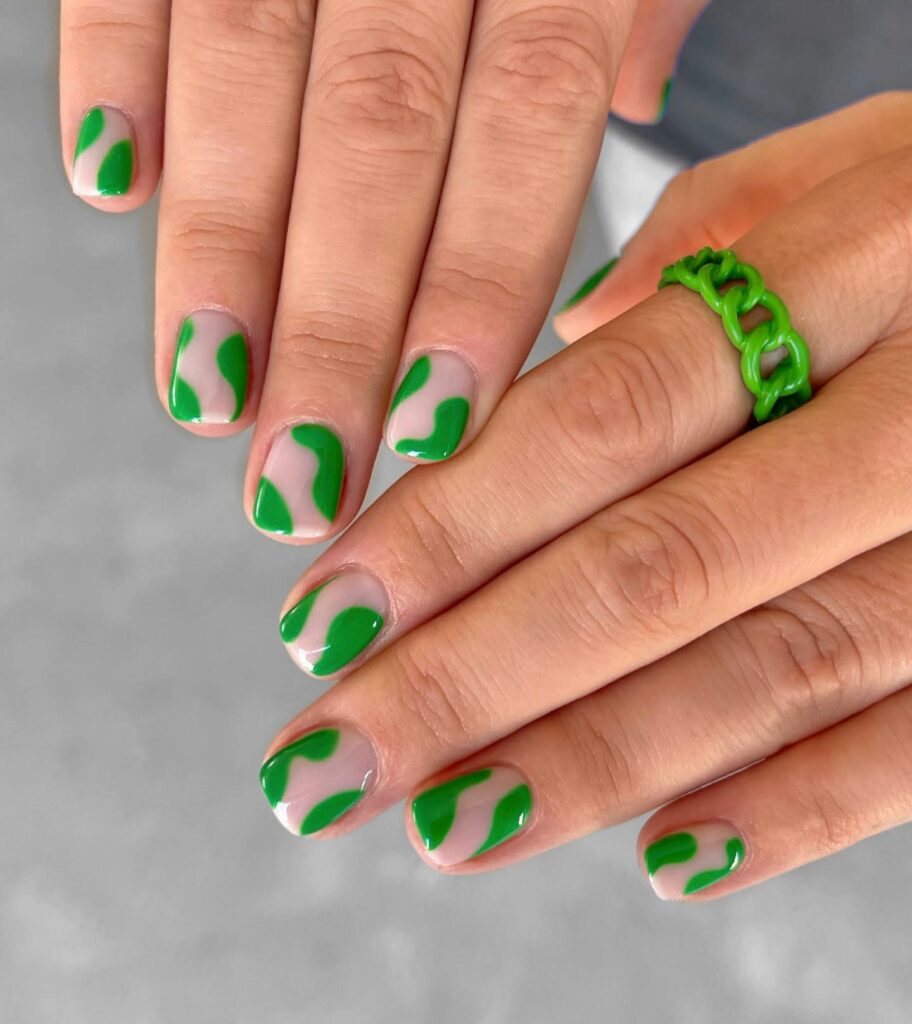
I love a good abstract design because you can make it your own. Add some splotches of green in different shapes and sizes, and you’re rocking a unique, artsy vibe.
Green Daisies
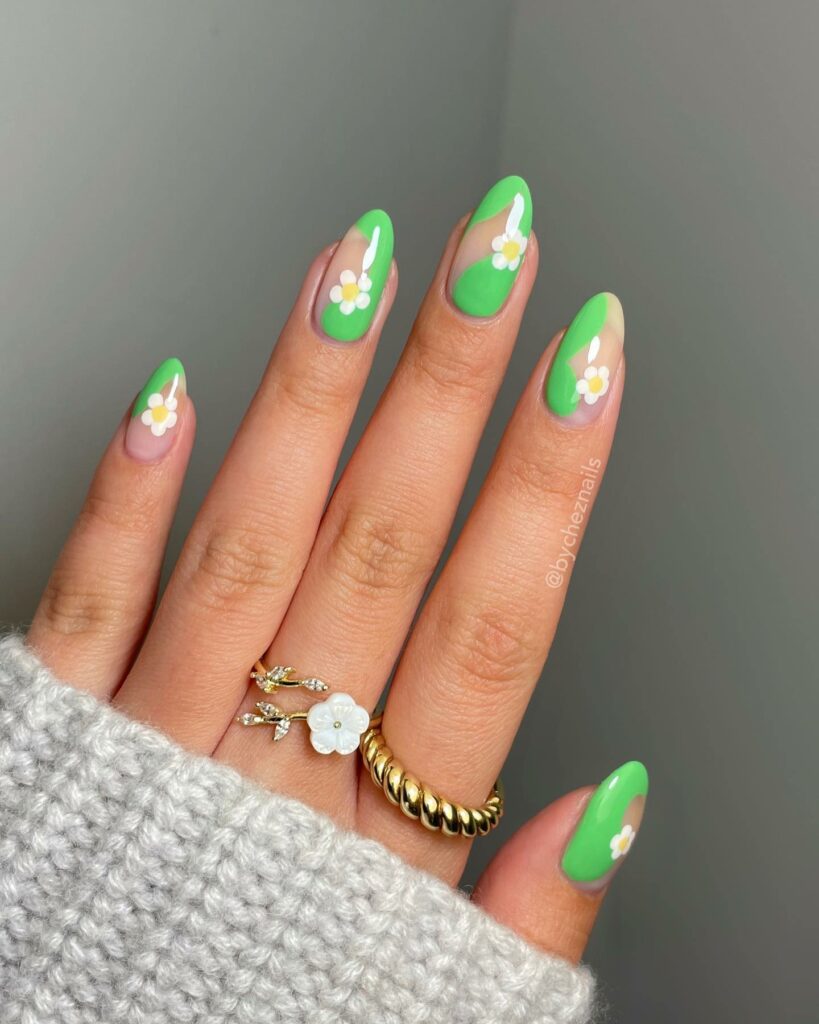
St. Patrick’s Day is almost a spring holiday, so why not combine the best of both worlds? Green daisies on your nails are festive and a cheerful nod to the coming spring.
Cute Flowers With Accents of Pearls
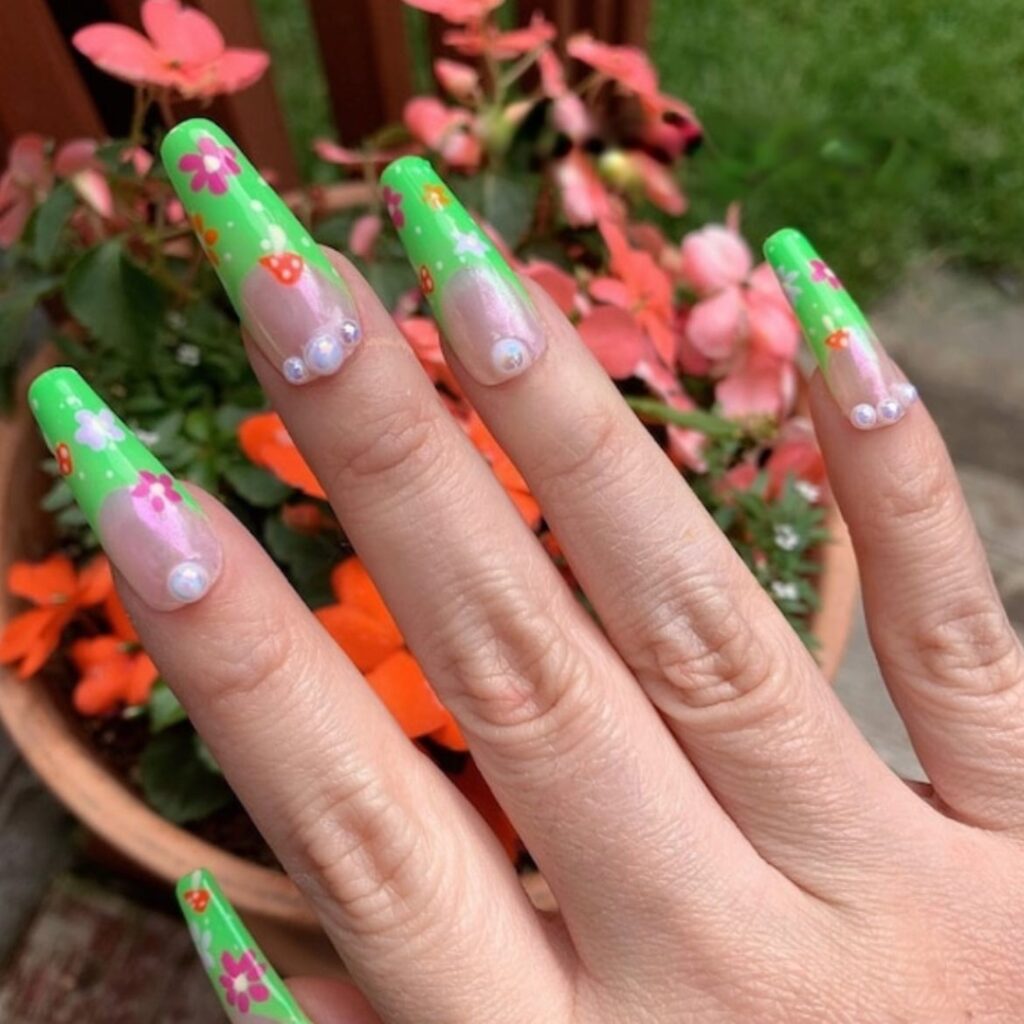
Cute Flowers With Accents of Pearls is a dreamy, feminine look that adds a touch of whimsy to your St. Patrick’s Day celebrations. The delicate floral designs, when paired with pearl accents, give your nails a luxurious vibe that’s perfect for those looking to stray from traditional green and gold themes.
St. Patrick’s Day Inspired Tips
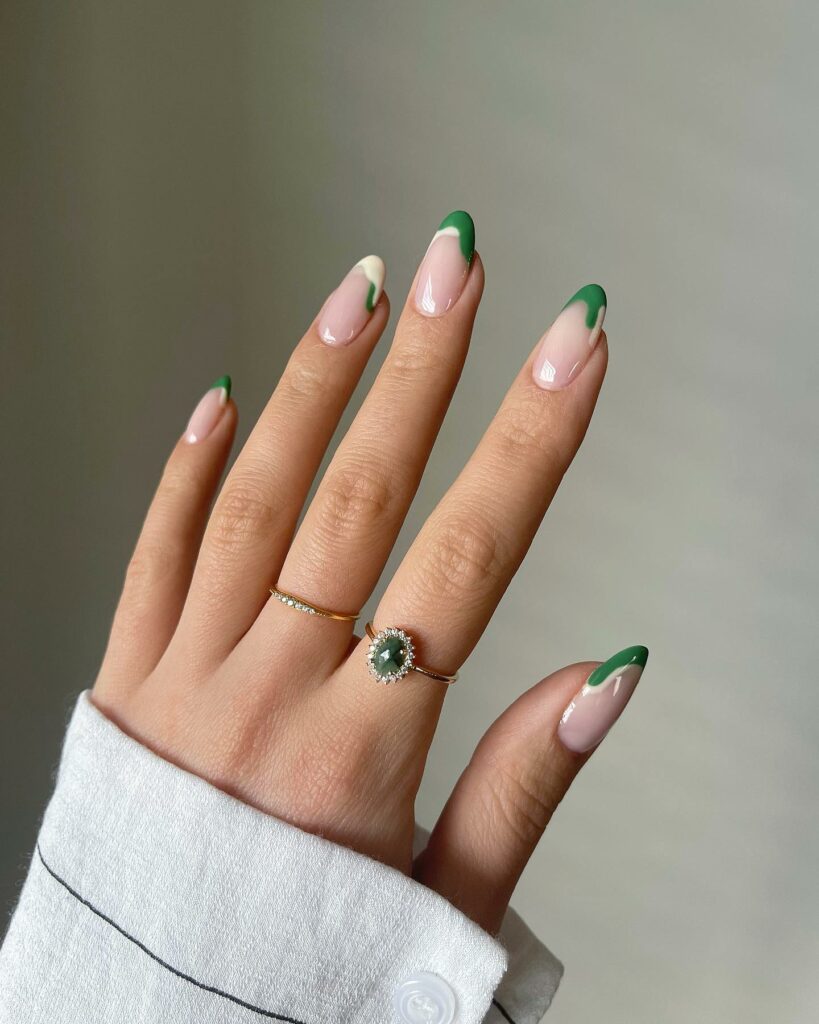
If you want to keep it low-key but still want a nod to St. Paddy’s Day, this one’s for you.
St. Patrick’s Day Nails With Green Accents
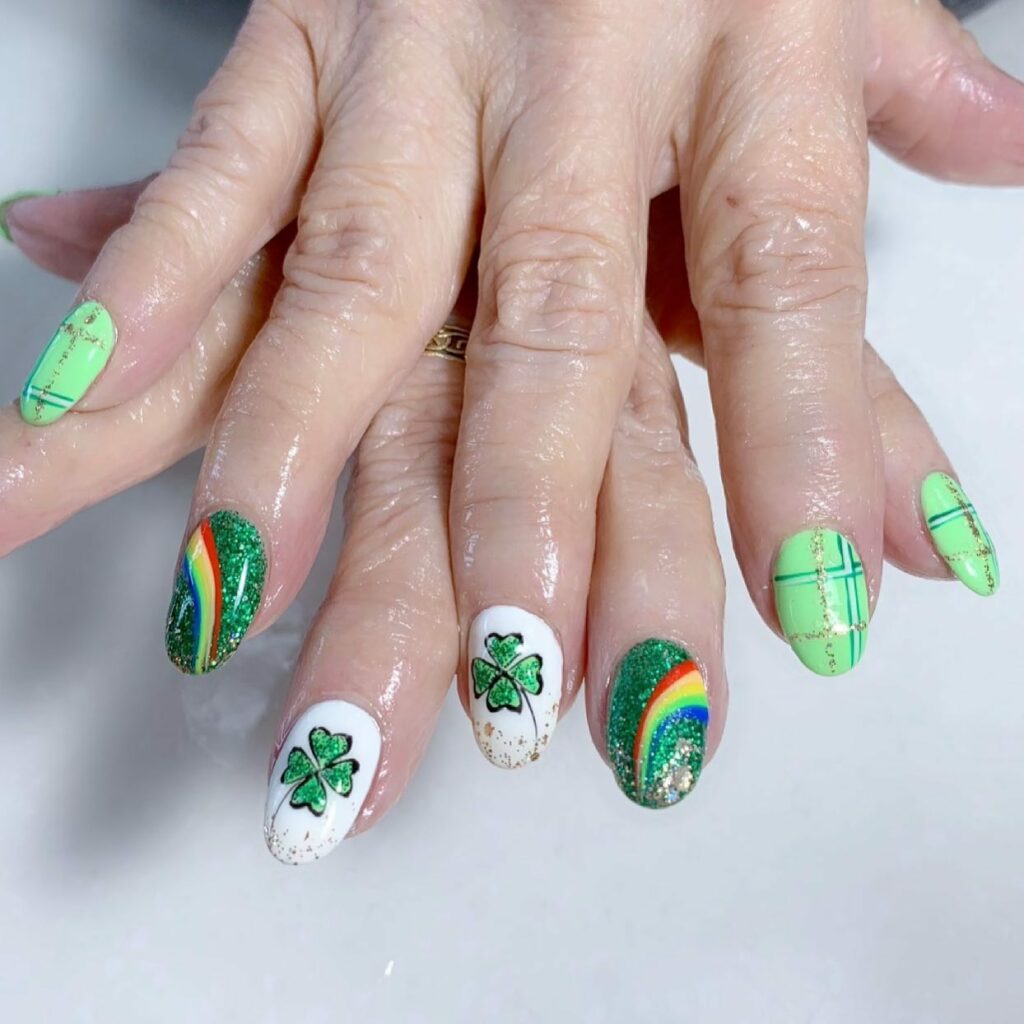
Spring is almost here, so why not kill two birds with one stone? This leafy, abstract design is both vibrant and spring-ready. Planning before you dip into your nail polish will go a long way here.
St. Patrick’s Sparkle On Your Nails
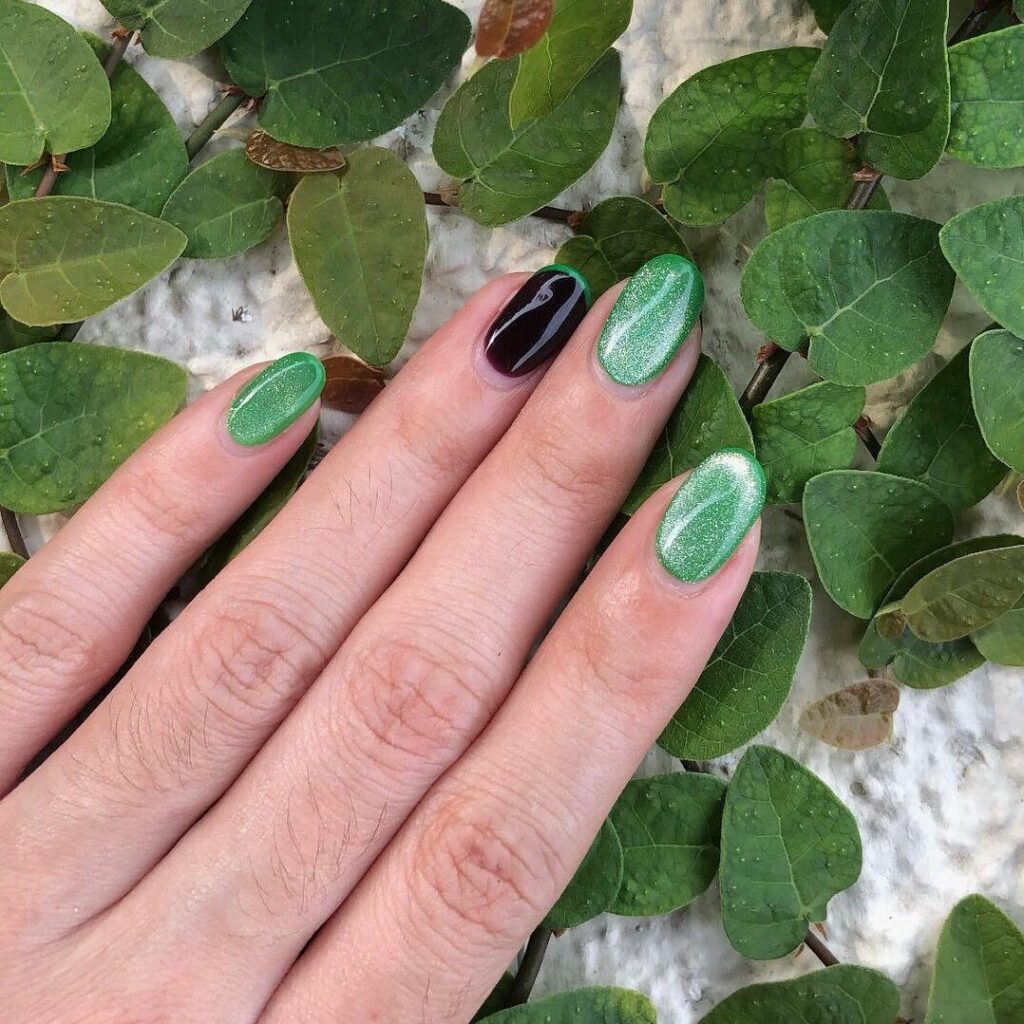
For those who want to celebrate but keep it ultra-subtle, this look is for you. A smidge of rainbow sparkle polish with a green iridescence can add that perfect festive flair without screaming, “I’m wearing a holiday on my nails!”
Floral St. Patrick’s Day Nails
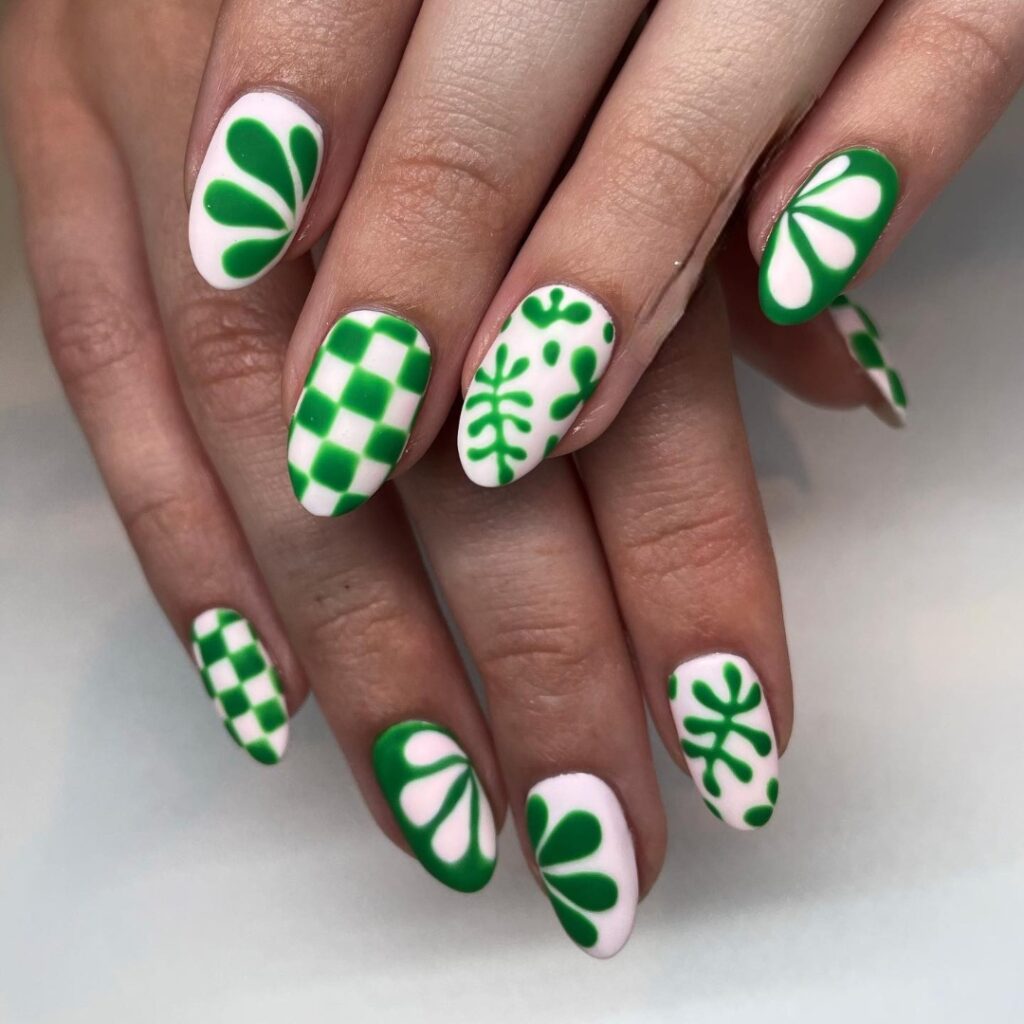
I’m a sucker for bold designs, and when you throw in some holiday colors? I’m sold. White balances out the green so well these nails are so easy to wear.
Yin and Yang Design for St. Patrick’s Day Nails
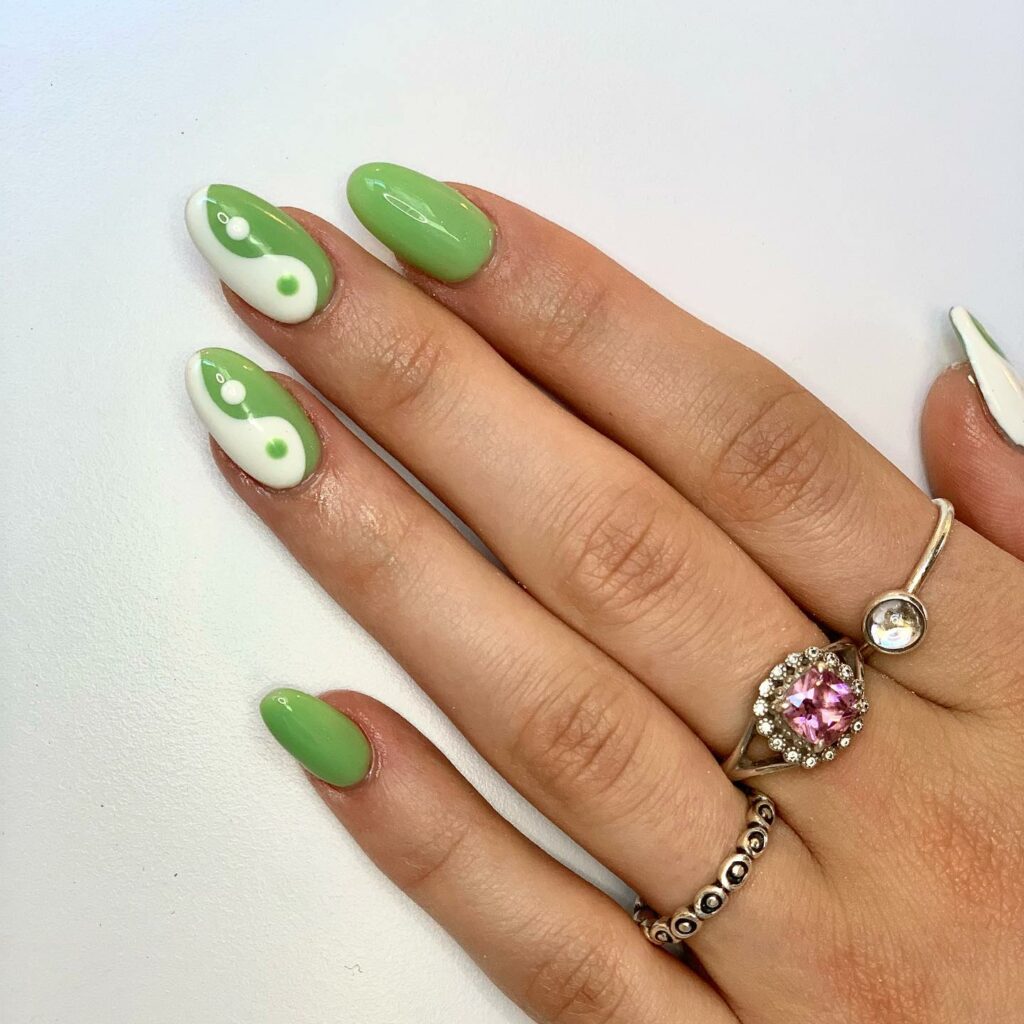
Mixing and matching different shades of green in a yin and yang design? Count me in. It’s a fresh take that’ll last long after the holiday ends.
All About That Gold
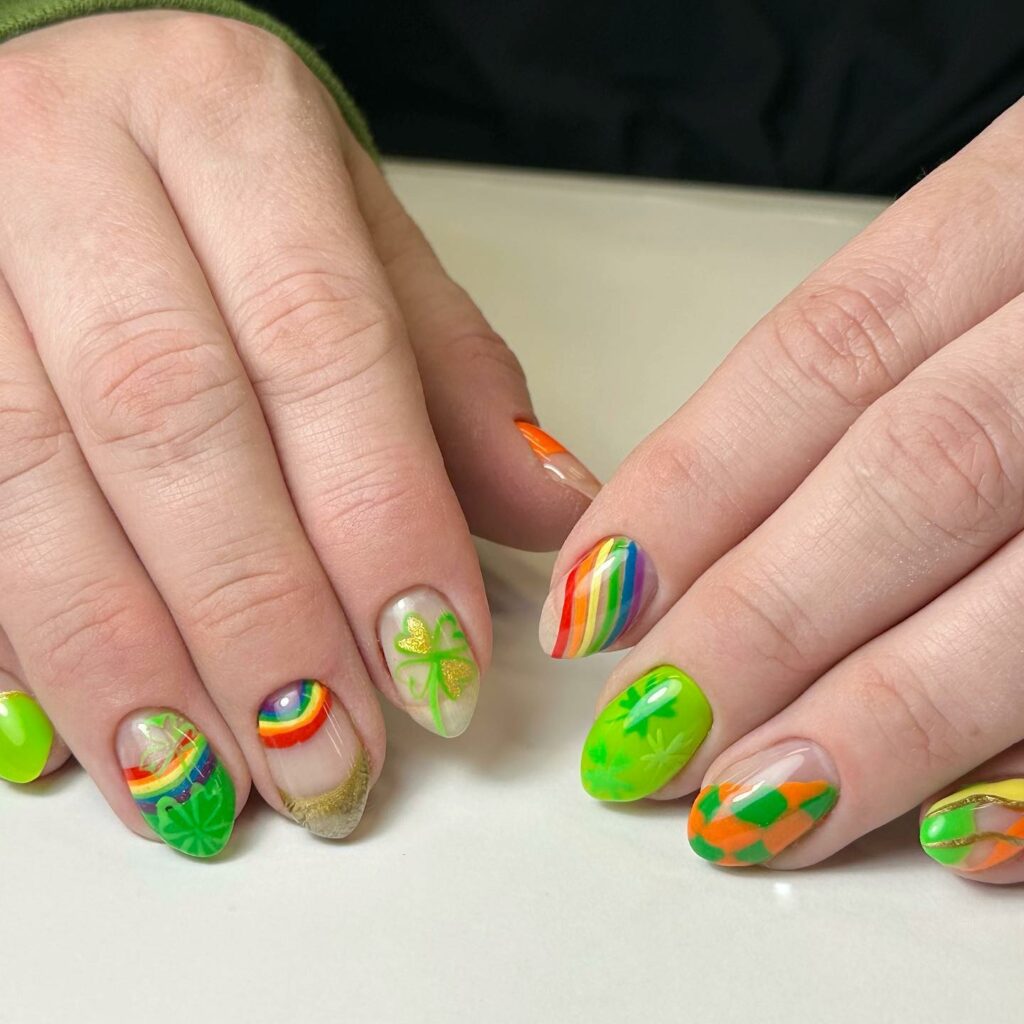
This is for those who want to go all out. Green French tips, the word “luck” etched on, and let’s not forget a sprinkle of gold glitter. It’s like a St. Patrick’s Day parade, but on your nails! And yes, I’ve done this, and yes, I felt fabulous.
Pastel Green Spectrum
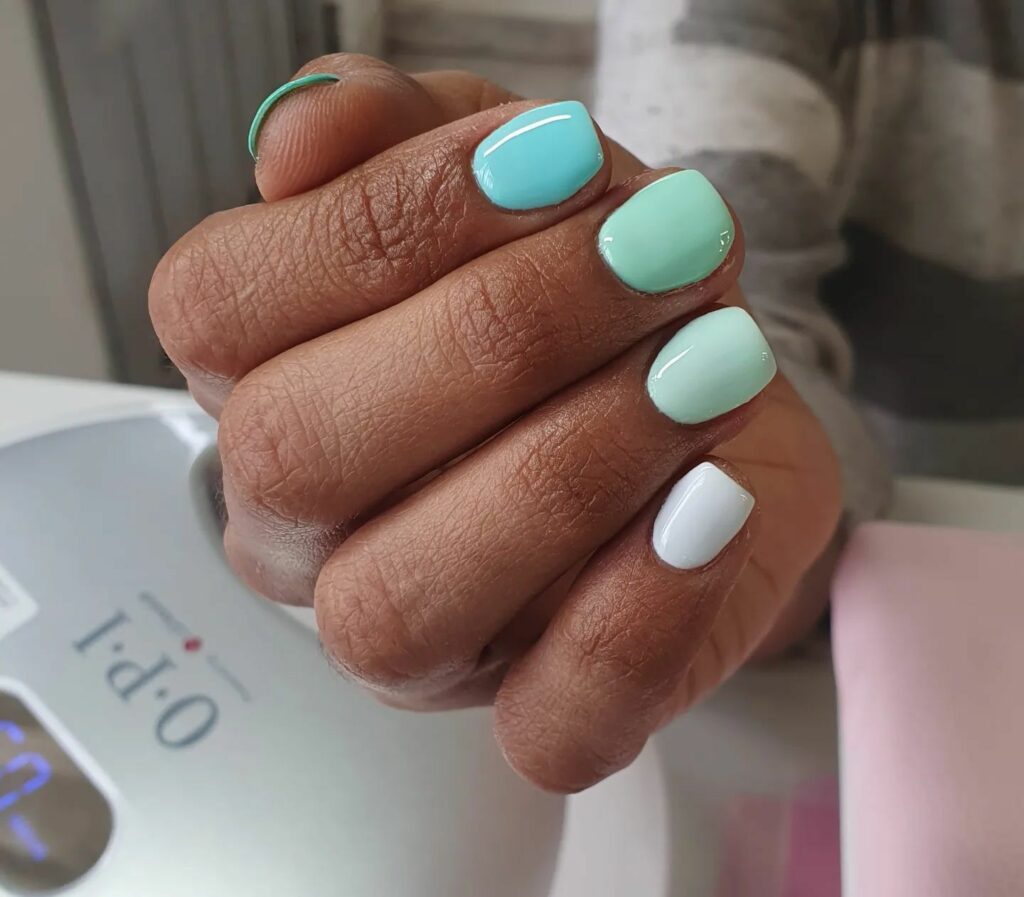
Pastel Green Spectrum nails offer a softer take on St. Patrick’s Day hues, transitioning seamlessly from minty fresh to sage in a beautiful gradient. It’s a subtle yet chic way to pay homage to the holiday, making it ideal for those who want to keep the festive spirit going beyond March 17th.
Cosmic Wonder

A water marble technique blending a golden green with a deep green creates a galactic, mesmerizing effect. It’s like your nails are celebrating St. Patrick’s Day on another planet!
Brands That I Recommend For Achieving St. Patrick’s Day Nail Art
- Base Coat: Always start with a quality base coat like OPI’s Natural Nail Base Coat. It sets the stage for the rest of the art!
- Top Coat: Seche Vite’s Dry Fast Top Coat is my go-to. It’ll keep your art sealed and shiny for all the holiday shenanigans.
For Solid Colors:
- Emerald Green: Try Essie’s “Off Tropic.” It’s the green you need for any solid or foundational work.
For Design & Detail:
- Nail Art Tape: Get your hands on some thin nail art tape. It’ll help you create straight lines and is super easy to work with.
- Detailing Brushes: For those intricate clovers and leprechauns, invest in a set of fine-tip nail art brushes.
- Nail Stamps: If free-handing designs are too intimidating, opt for a St. Patrick’s Day-themed stamping plate.
For Special Effects:
- Glitter Polish: A little sparkle never hurts! I love ILNP’s “Lucky One,” a green holographic polish that’s so eye-catching.
- Gold Foil: If you want to add a pot of gold to your nail art, small sheets of gold foil can be gently pressed onto tacky polish for a luxe effect.
- Matte Top Coat: For those who love the matte trend, OPI’s Matte Top Coat is a winner.
- Green Iridescent Polish: Add a swipe of green iridescent polish like ZOYA’s “Apple” to make your design pop without going overboard.
Are There Any Tips Or Tricks On Executing The Nail Art Designs Mentioned In The Text?
- For Gradient Designs: Use a Makeup Sponge: Apply shades of green polish to a makeup sponge and gently dab it onto your nail to create a gradient effect. It’s super easy, but it looks like a million bucks!
- For Tiny Details: Toothpick Magic: No fine brush? No problem! A toothpick can be a lifesaver for tiny details like shamrocks or writing out “luck.” Dotting Tool: Use a dotting tool or even the tip of a bobby pin for evenly sized dots or small shapes.
- For Stripes and Straight Lines: Tape It: If you’re going for straight lines, lay down some nail art or scotch tape to make those edges crisp.
- For Stamping: Steady Does It: Roll the stamper over the design instead of pressing it down for a cleaner lift and application when using a stamping plate.
- For Stickers or Foils: Apply on Semi-dry Nails: If you’re using stickers or foils, your nails should be tacky but not completely dry to ensure they stick, but they can also be repositioned if needed.
- For a Clean Finish: Cleanup Crew: Dip a small brush into some acetone to clean up any mistakes or polish that gets on your skin.
- General Pro Tips: Thin Layers: Always go for thin, multiple layers rather than a single thick one. This helps your polish dry faster and last longer. Patience, Darling: Wait for each layer to dry before adding the next one. It’s hard when you’re excited, but it’s worth it for that perfect finish! Test First: If you’re trying a new design, practice on a piece of paper or a nail wheel first. Trust me, you’ll thank yourself later. Top Coat Timing: Wait 5-10 minutes after your last design layer before applying a top coat to avoid smearing your art.
So grab your toolkit and make some St. Paddy’s Day magic! And hey, if you stumble upon a pot of gold—or at least a pot of golden polish—make sure to tag me. Happy nail art-ing!
Still Looking for Inspiration, Then Check Out This Video
Conclusion
Alright, lovelies, there you have it! We’ve run the gamut from the “keep it simple, sweetheart” emerald greens to the “I’ve got this” intricate designs. Remember, your nails are the ultimate accessory, so let them shine this St. Paddy’s Day! If you’re going DIY, my top tip is to take your time and invest in some quality nail art tape or stick-on designs. And hey, don’t forget to snap some pics before you dive into that green beer—I’d love to see your fabulous nails in action. Till next time, keep slaying, and have a fantastic St. Patrick’s Day!
Feature Image Photo By @igorjovic on Instagram


